Build Log:
Jaws Scene in Bottle:
Who can forget the 1975 thriller film "Jaws", that made everyone just a little weary about going in the water. Though it lacked the special effects of movies today, the idea of a giant, man eating, great white shark lurking in the waters, awaiting its next potential victim makes me shudder within and convinced the minds of plenty, that the water is not always the safest place to be. Winning much critical accaim and awards, Speilburg's Jaws will certainly go down in history as one of the best films ever created.
Upon speical request, I get the task of recreating a combination of scenes from this very movie within a bottle. Please enjoy!
Carving the Hull:
|
|
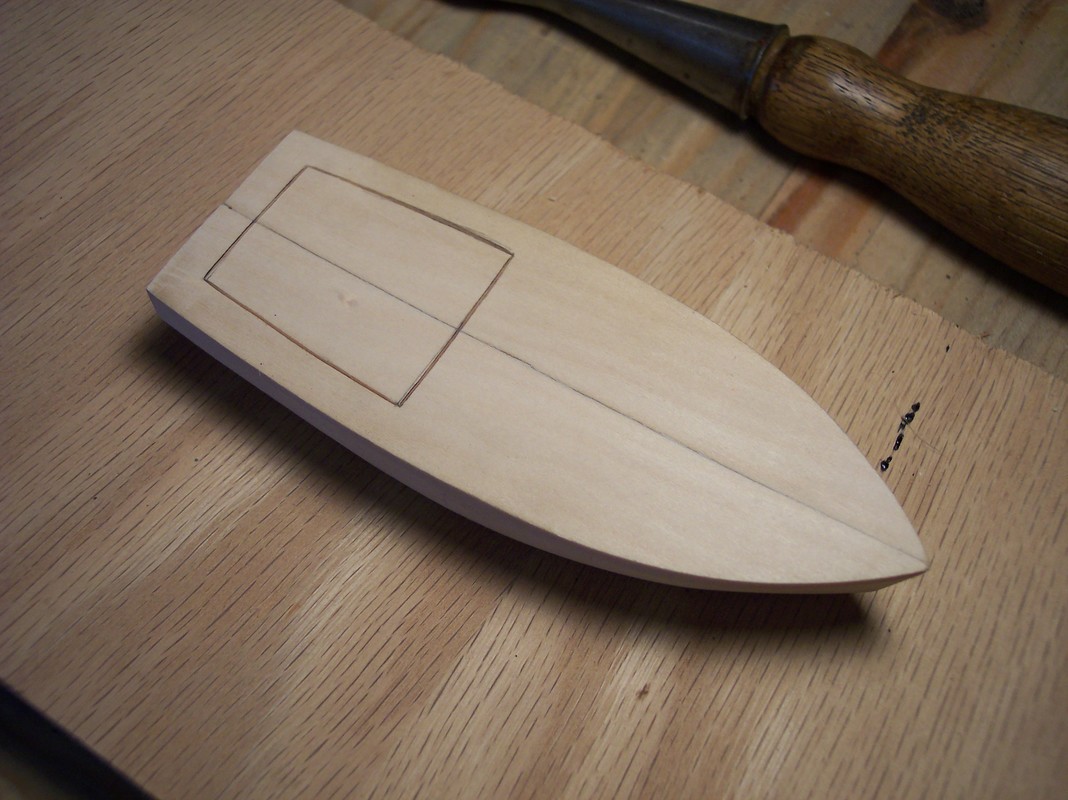
Like most of my models, the "Orca," is carved from a block of bass wood the has previously been cut in two halves. Above left, you can see the outline for the cockpit is sliced into the wood using an exacto knife, which allows me to easily scoop out the interior with chisels.
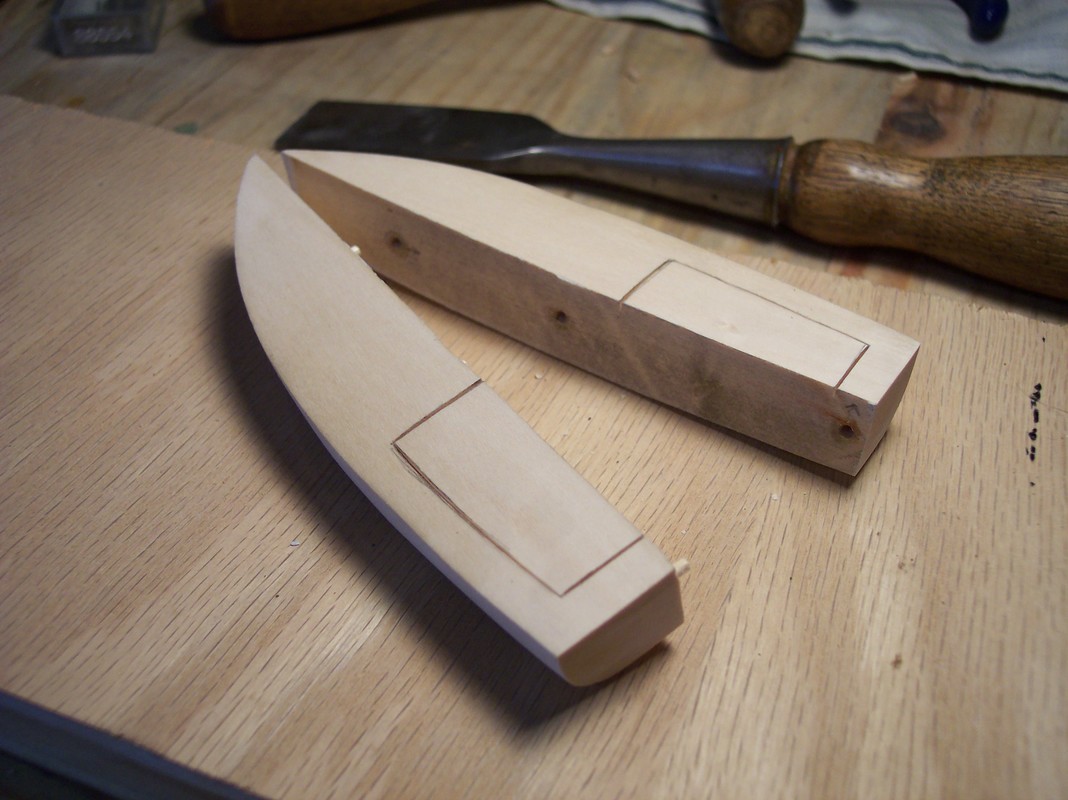
Above right, dowels are inserted into one side, which keeps the two halves lined up during its fabrication, and allows me to reassemble the pieces exactly once it is inside the bottle.
Above right, dowels are inserted into one side, which keeps the two halves lined up during its fabrication, and allows me to reassemble the pieces exactly once it is inside the bottle.
|
|
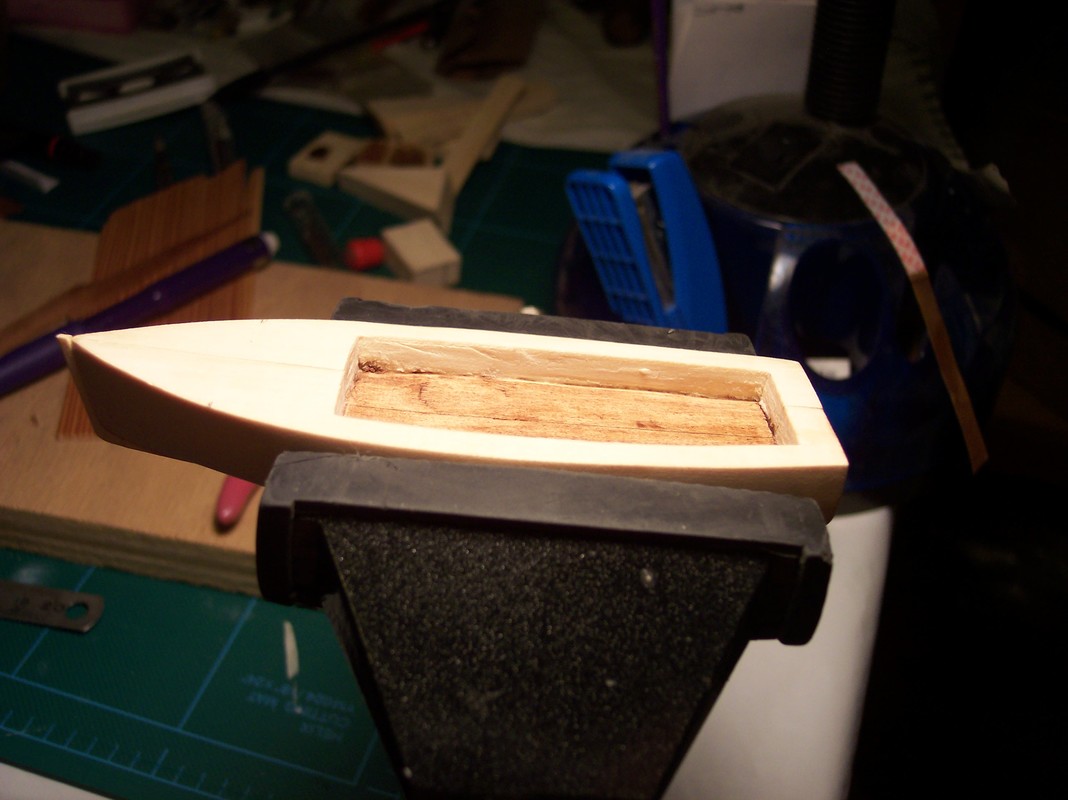
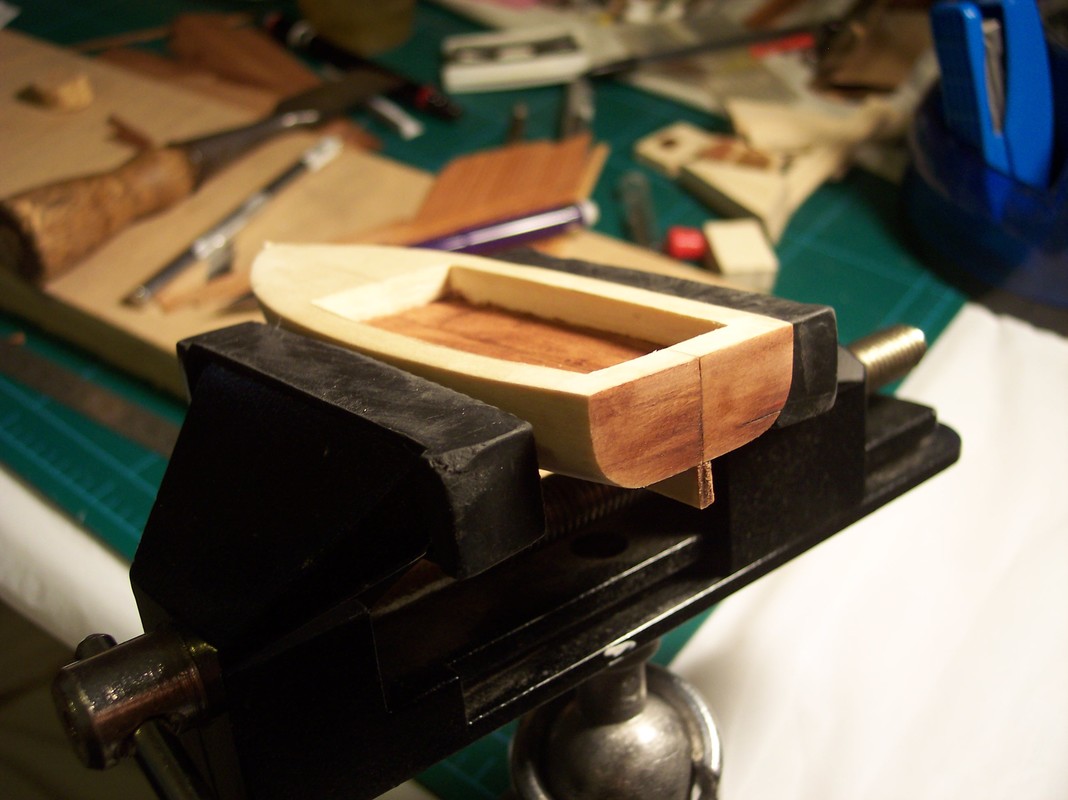
The cockpit and what would be the interior of the cabin has been roughly carved out. I applied a light coating of stain on the flooring and transom.
Developing the Cabin:
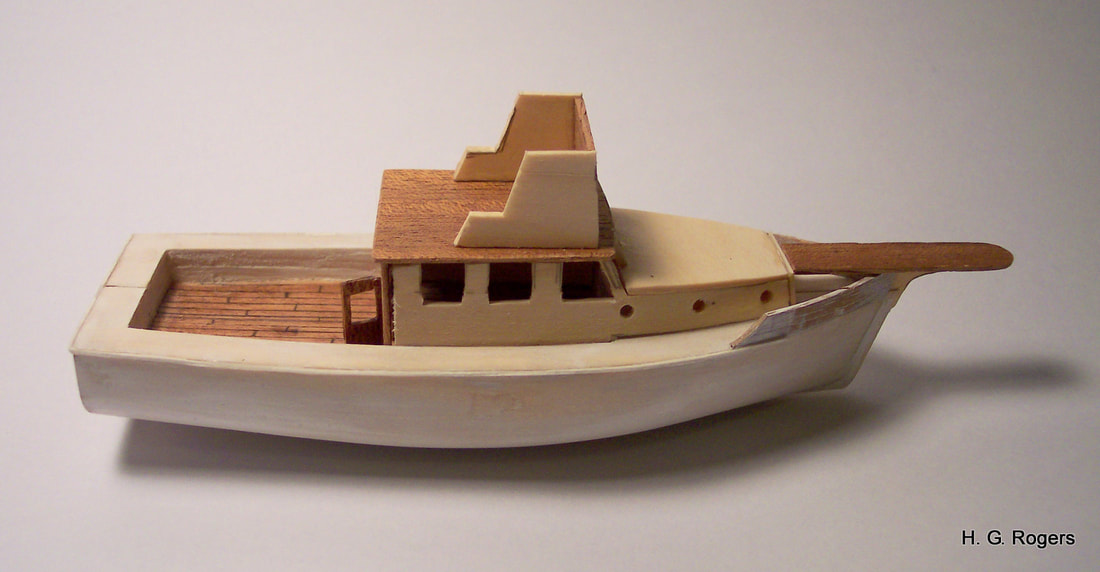
Trying to figure out just how to create the cabin, so that it would pass through the neck of the bottle and come together without too many problems inside the bottle, was a great puzzle!
I came up with a plan to attach the cabin walls (port and starboard) to the hull of the boat, while having only the roof and rear bulkhead remain as a separate part. This would drop down and into position. It was a fragile affair at first but once it was glued up, all was well. The roof being one piece also hides the seam of the two hull halves, which will most likely only be evident on the transom. |
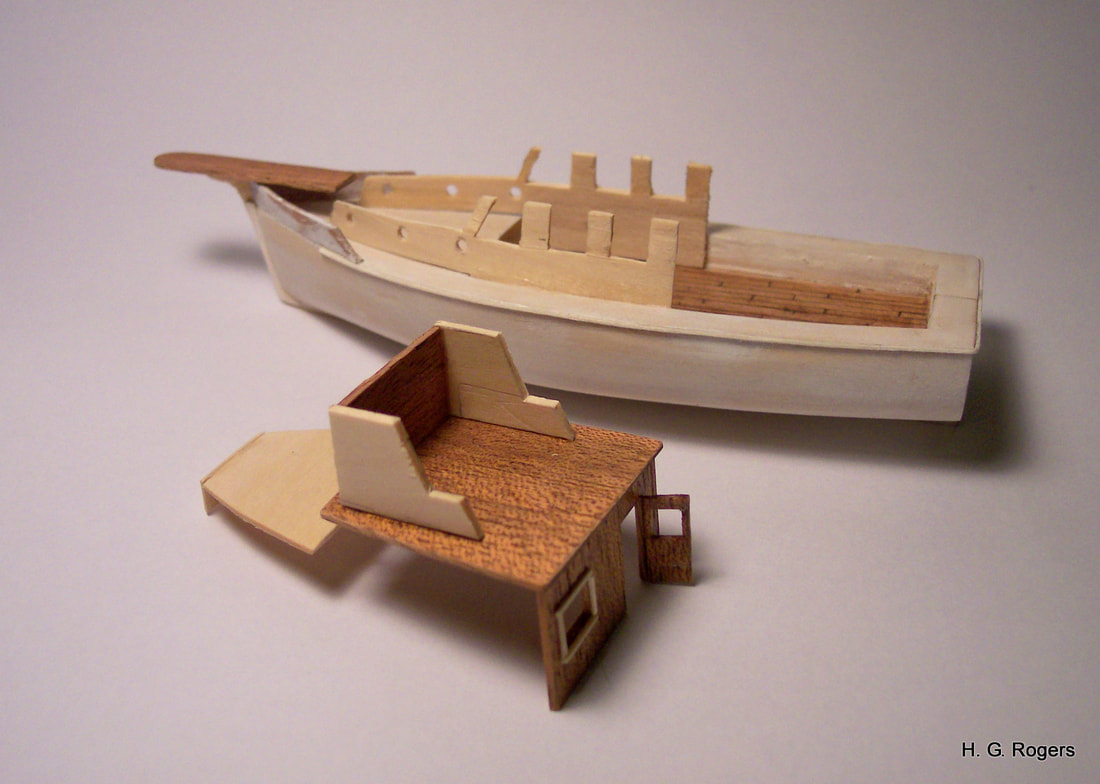
|
Paint and Details:
|

|
|
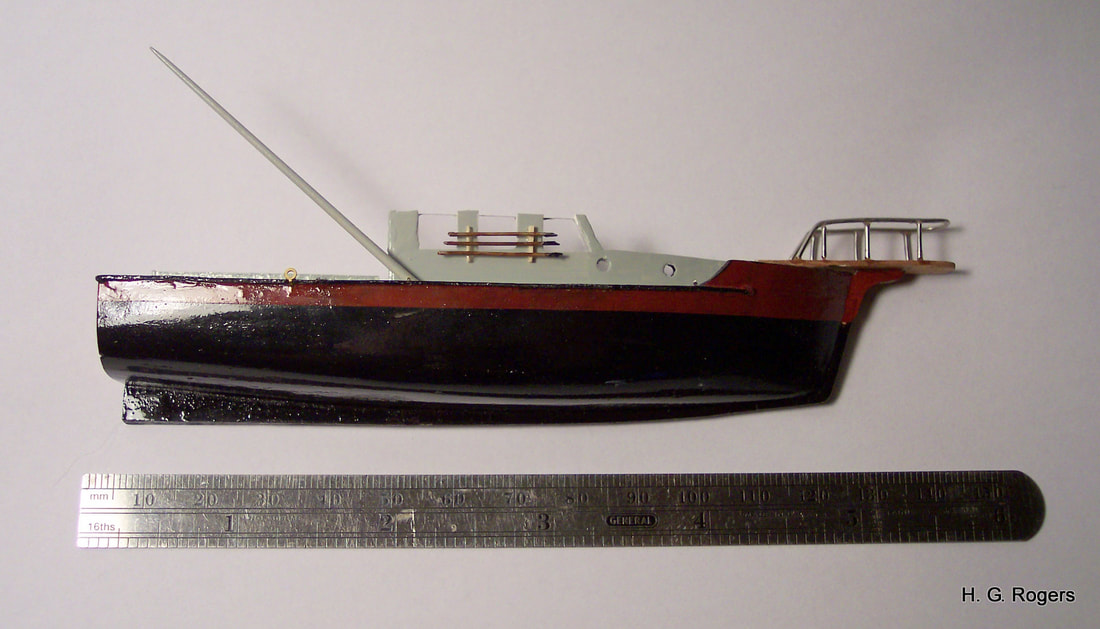
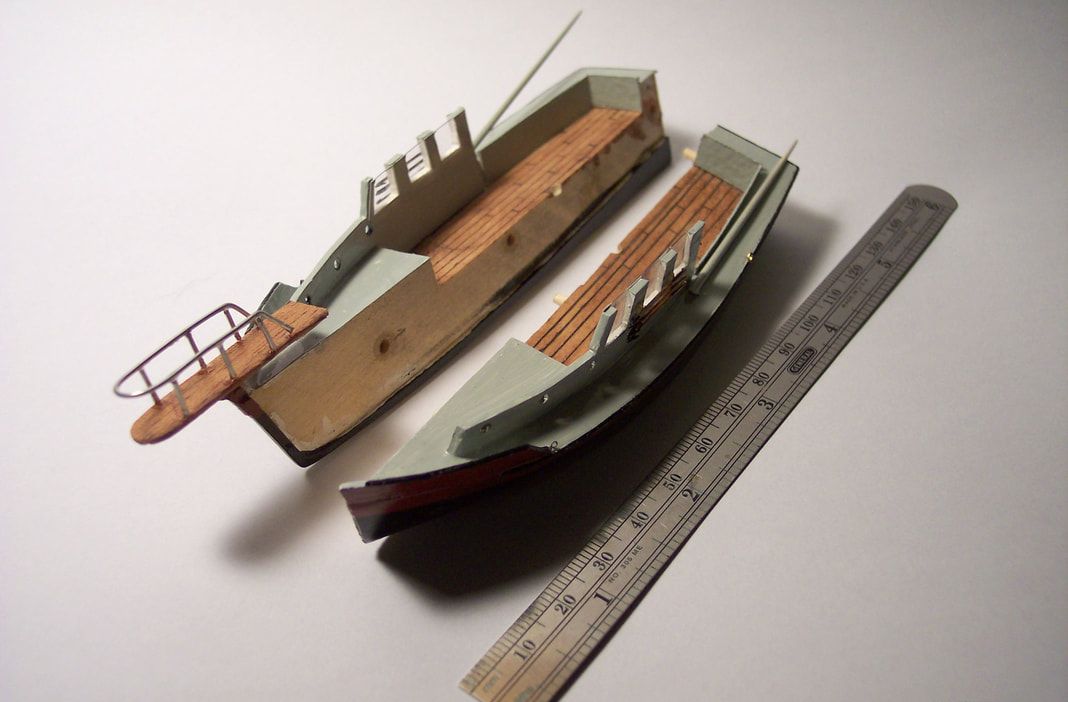
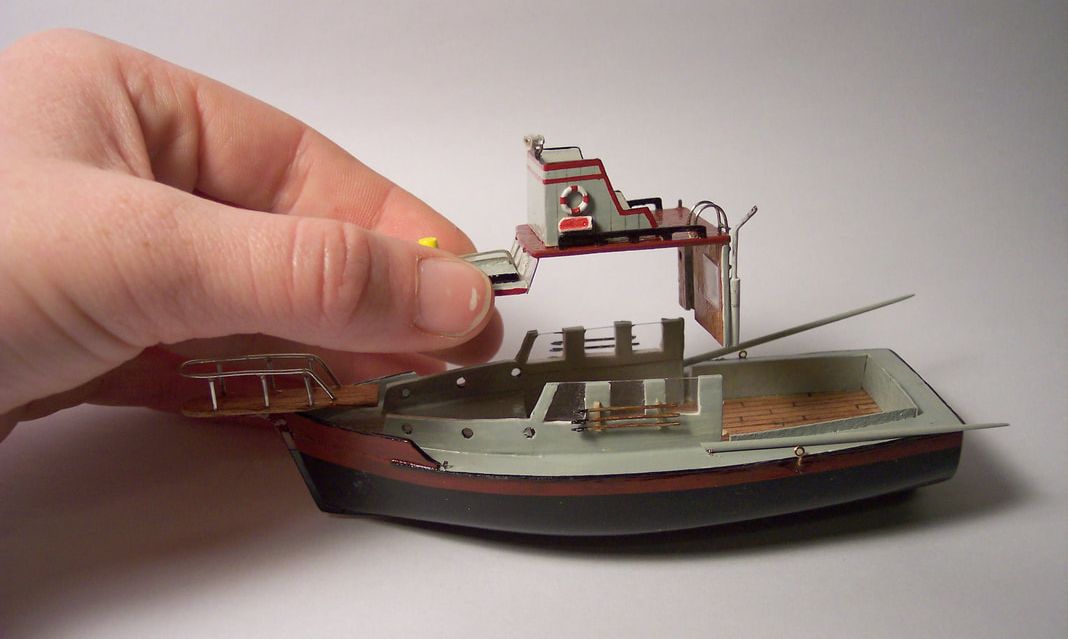
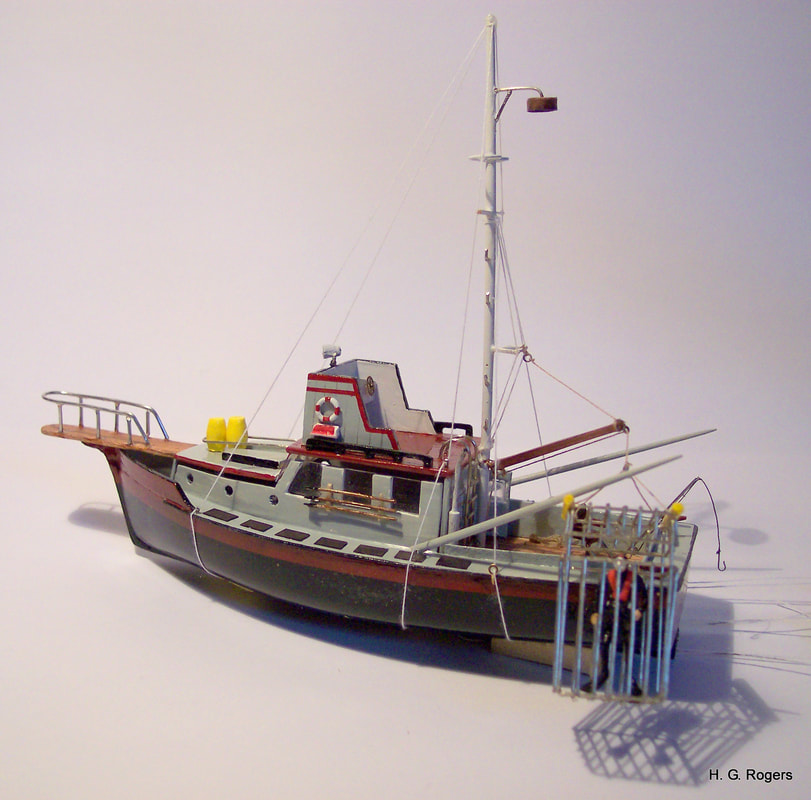
Once the boat gets a little paint on her, there is a huge transformation that takes place, often making it appear as if I have missed photographing many steps in between. Above, you can see the two separate sections of the hull laid out with a ruler to give size. Harpoons are attached to the cabin sides, the bow now has its pulpit, made of wire, and the windows of the cabin are made of clear plastic sheets, so that light can pass through.
|
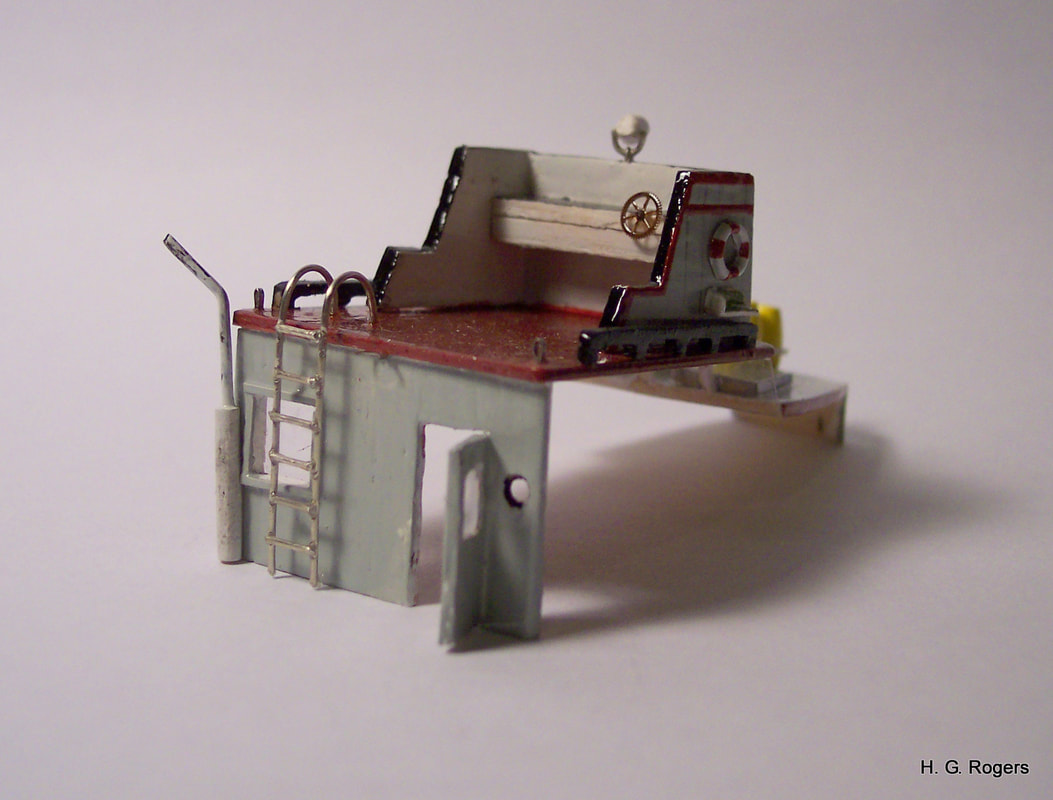
Left: On the rear bulkhead a chimney stack was made from a toothpick and wire. The ladder, made of wire, sits just left of where the mast will stand, and a tiny watch gear represents the steering wheel.
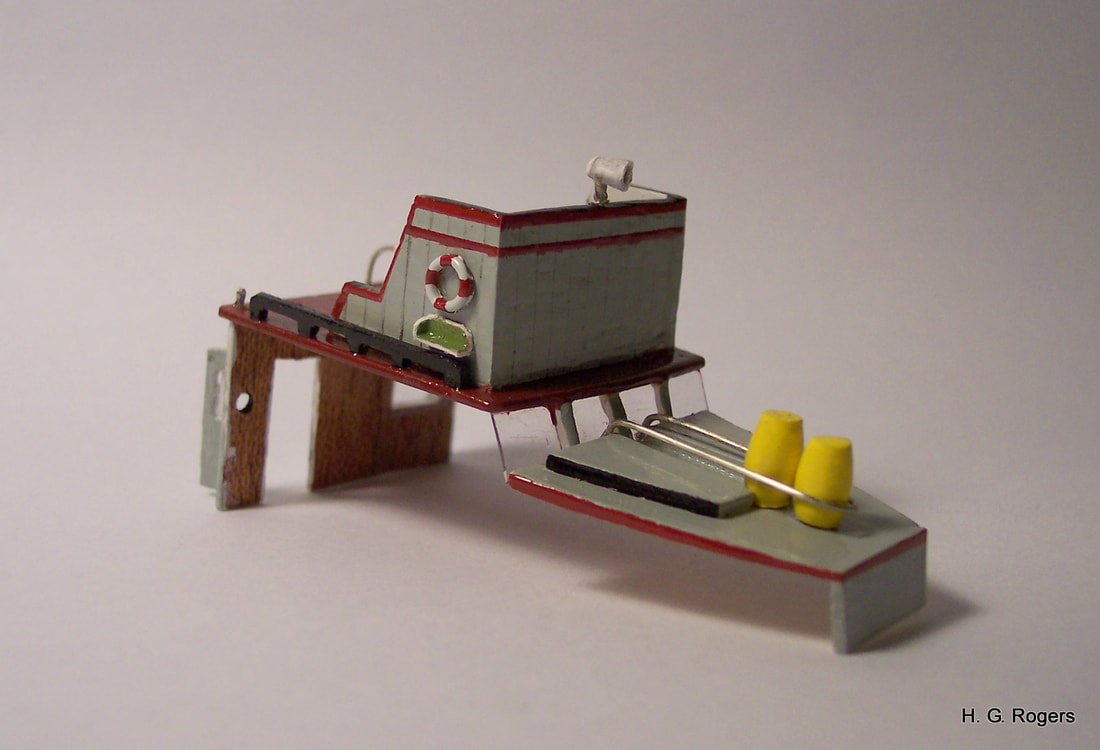
Right: The cabin top has really begun to take form! The running light boards as well as a life-ring are attached on each side. Two barrels, made of turned dowels sit on the cabin top, and there is a black handrail on the edge of the cabin top, made of wood. |
|
|
|
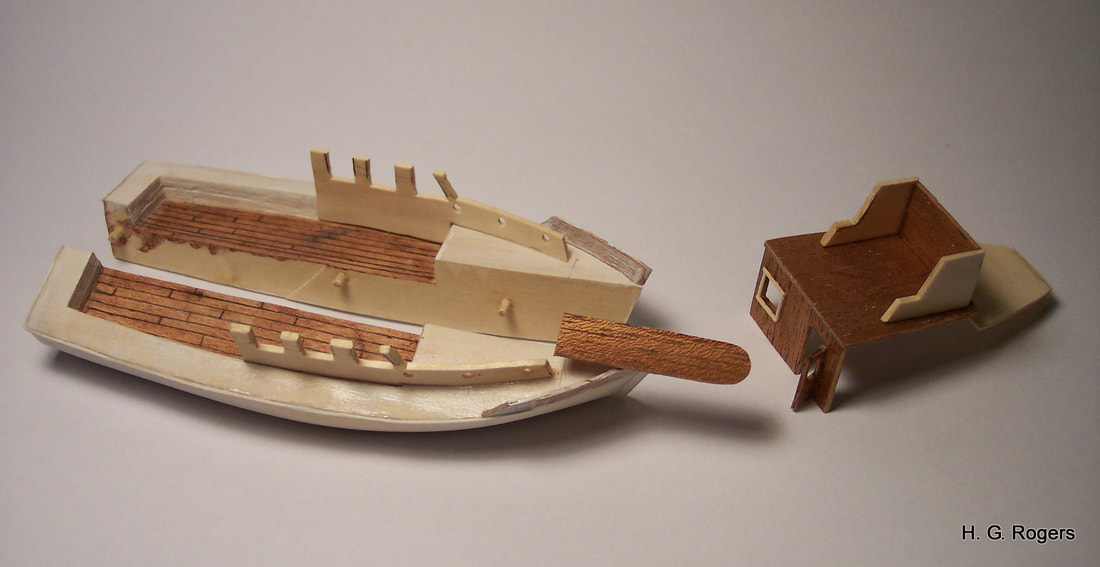
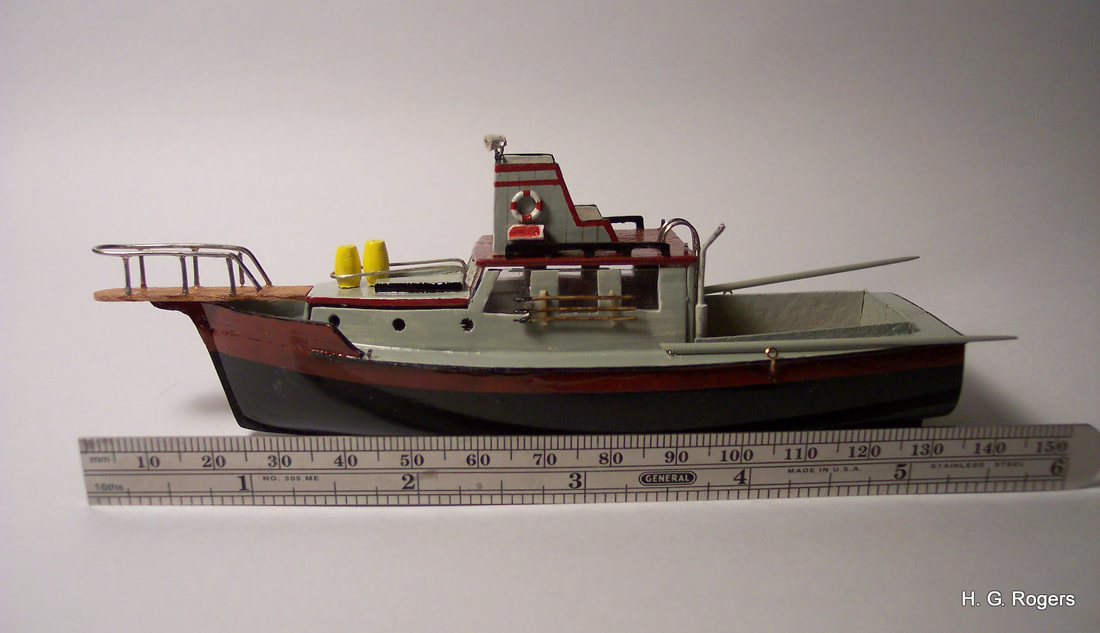
Above: You get an idea of just how the cabin will fit onto the hull. Once everything is fitted together the boat truly starts to represent the real "Orca." The mast with all its rigging lines remains to be made, as well as the shark, the shark cage, captain, and crew.
The Mast:
|
|
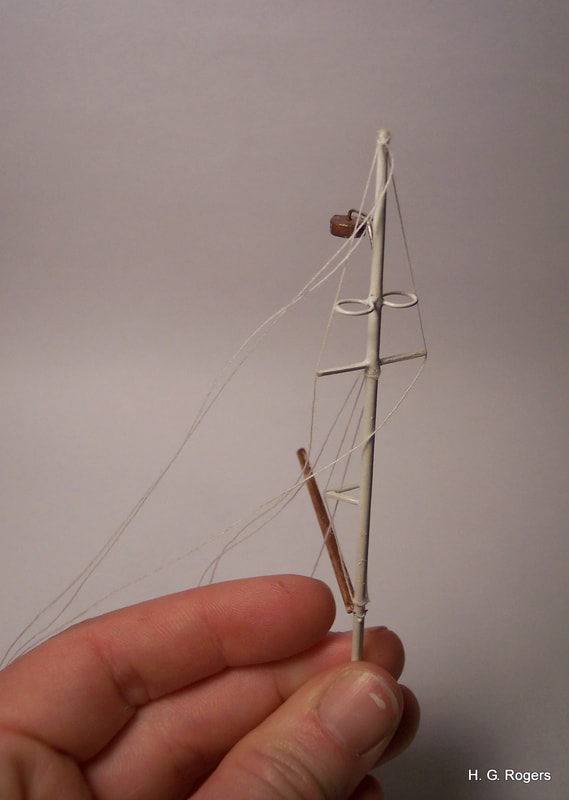
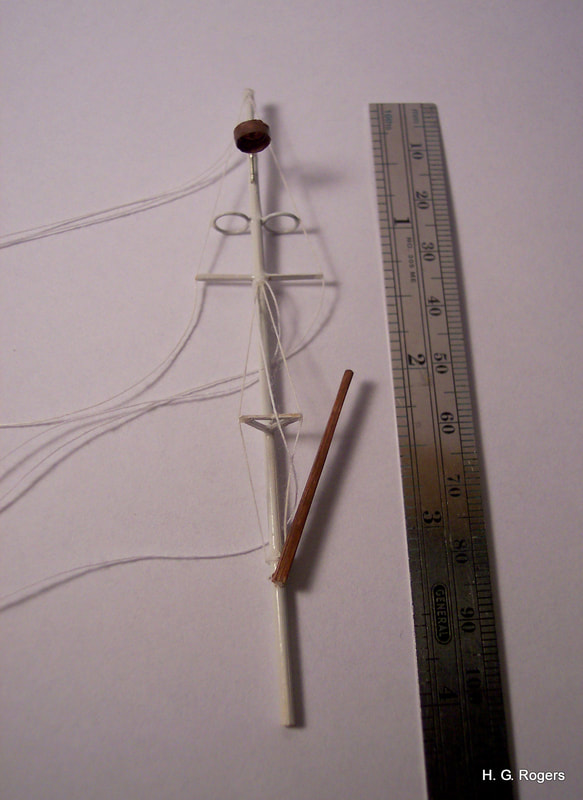
The mast is made from a bamboo dowel, turned down on a dremel tool with sandpaper, to create the taper. Bamboo is a really great wood for masts since it is very strong and flexible, limiting its chance of getting broken when being inserted into the bottle.
The boom is simply a length of basswood stained. Like a sailing vessel, she has spreaders and shrouds, but also includes more details, such as the large deck light at the top and two hoops, above the spreader, where a man would stand at lookout. The boom rigging will be attached to the triatic, and before calling the mast finished, she will also have a full set of steps leading up to the spreaders. |
A Few More Details:
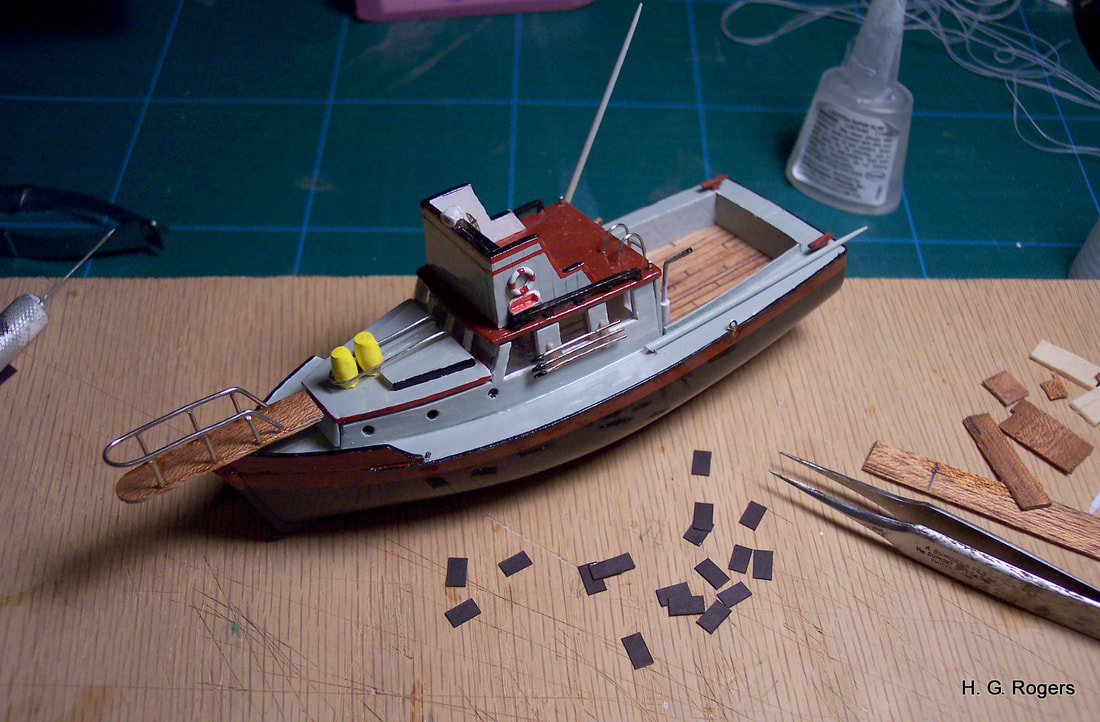
The black rectangles represent the non-skid mats that will be placed on each side of the deck.
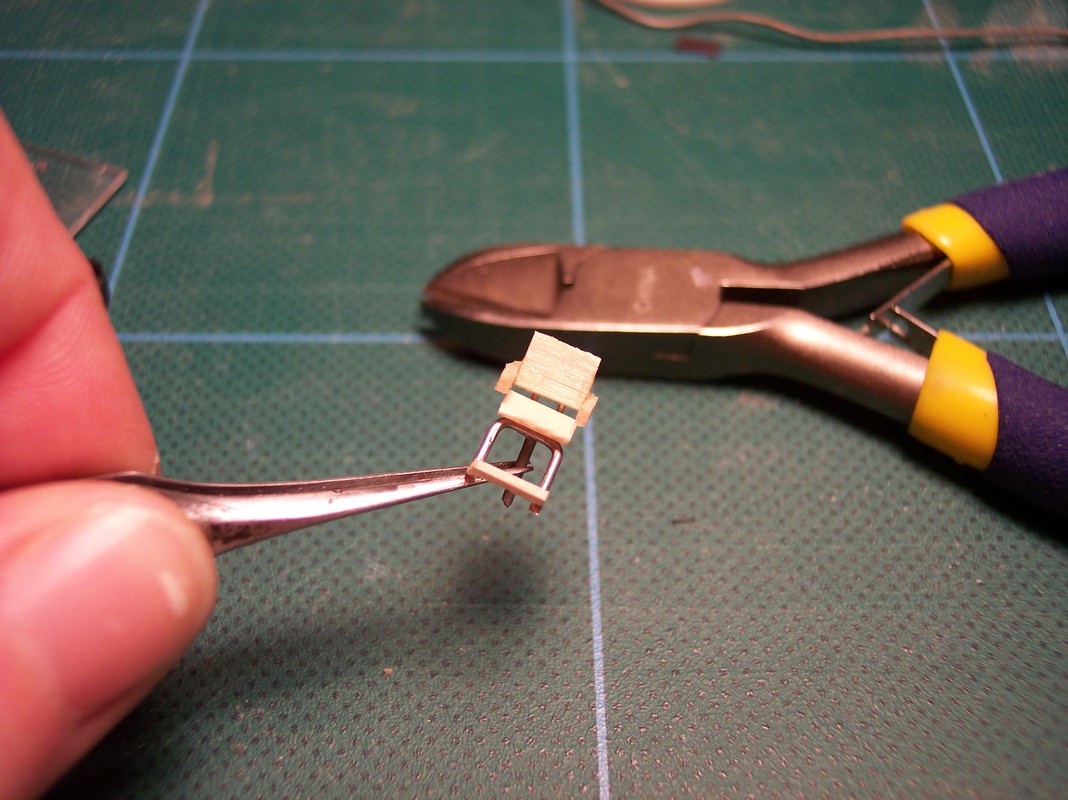
The cockpit itself would not be complete without the fisherman's chair. Measuring only 10mm tall.
|
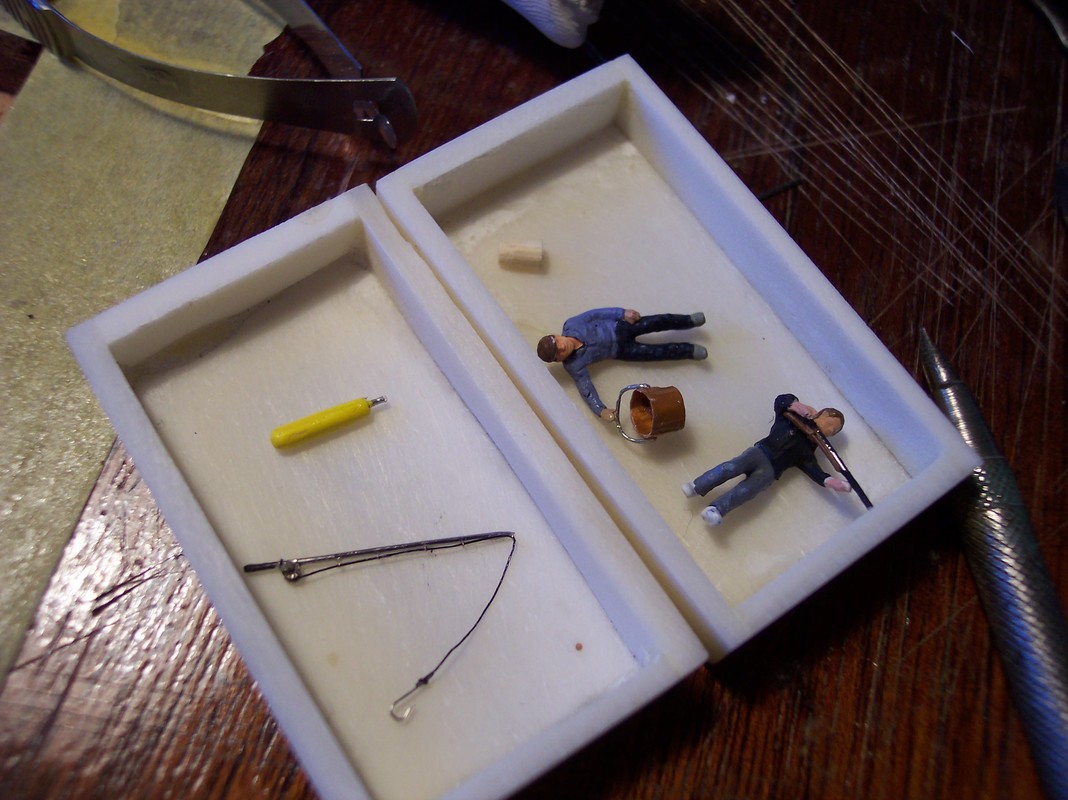
The amount of details makes all the difference when an artist is tyring to bring to life a scene like this one. A miniature fishing rod is made of a needle. Miniscule hoops (watch washers) act as the eyes, through which a line passes. The reel is a gear from a watch.
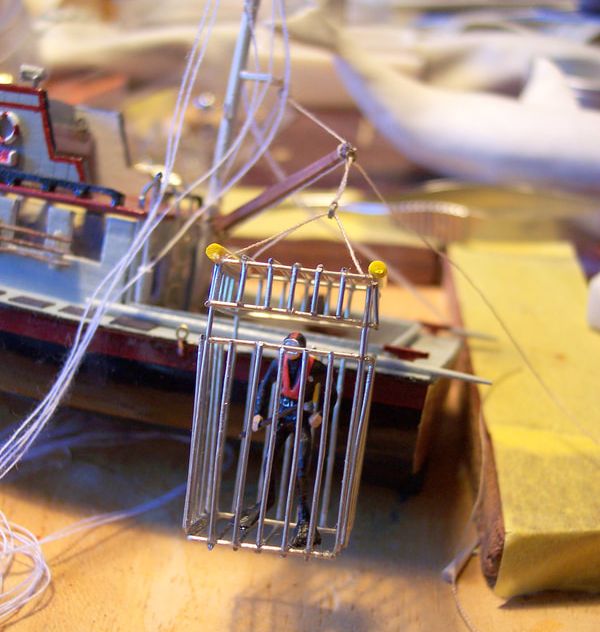
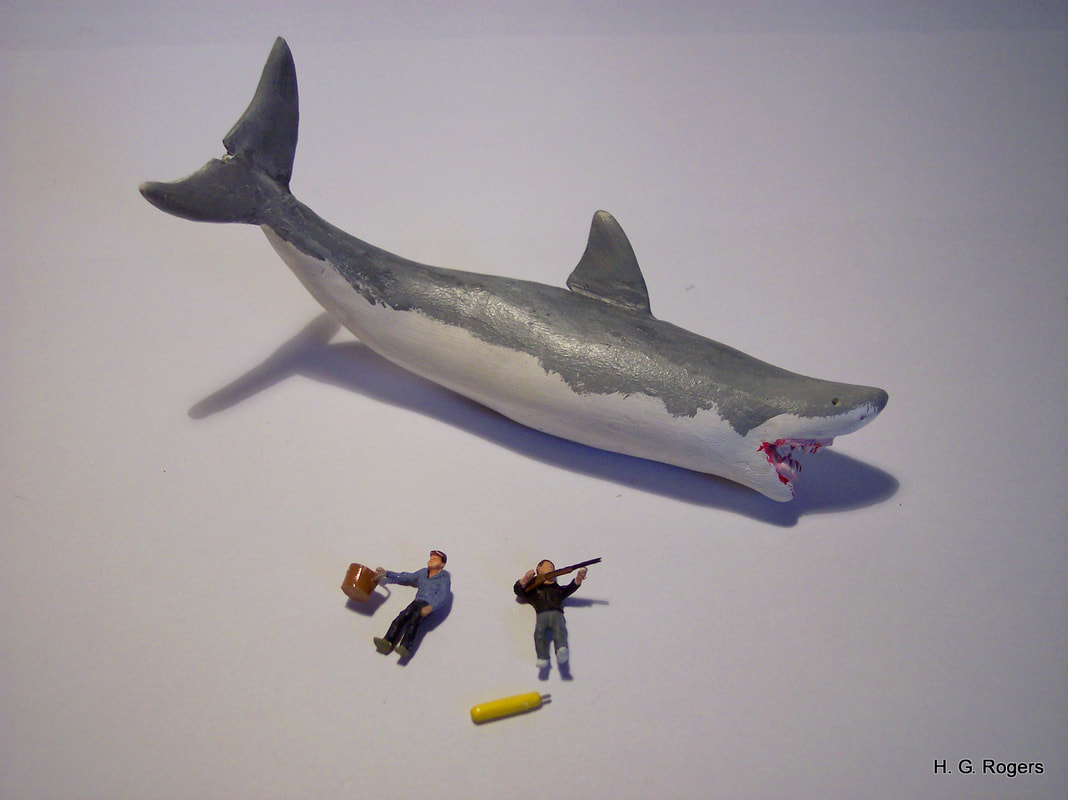
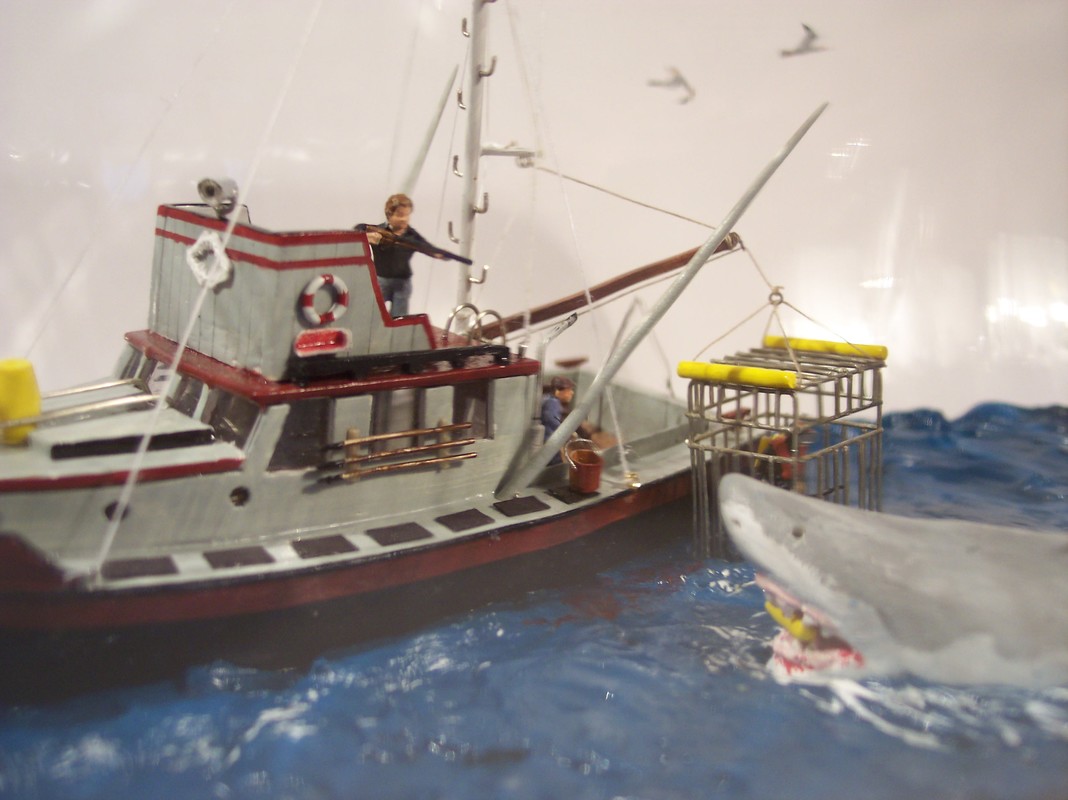
If there are people, they must be directed to a task. The personna holding the bucket represents Quint (the shark hunter). He will be handing a bucket of chum. Brody (the police chief) holds the rifle and will be taking aim at the shark before its final moments. Hooper (oceanographer) bravely takes to what he calls the shark proof cage in an attempt to stab the animal. Each of the little personnas are model train figures who have undergone some alterations, including the cutting off and reshaping of the arms and then re-painting. |
The Shark:
|
|
|
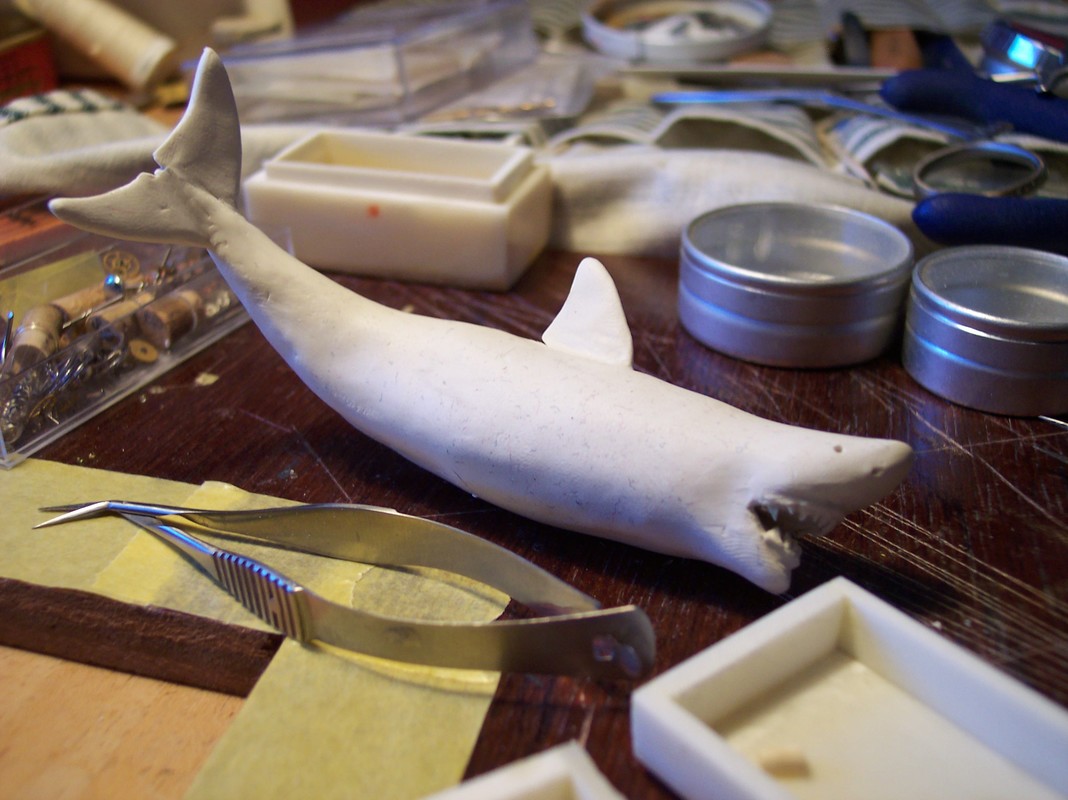
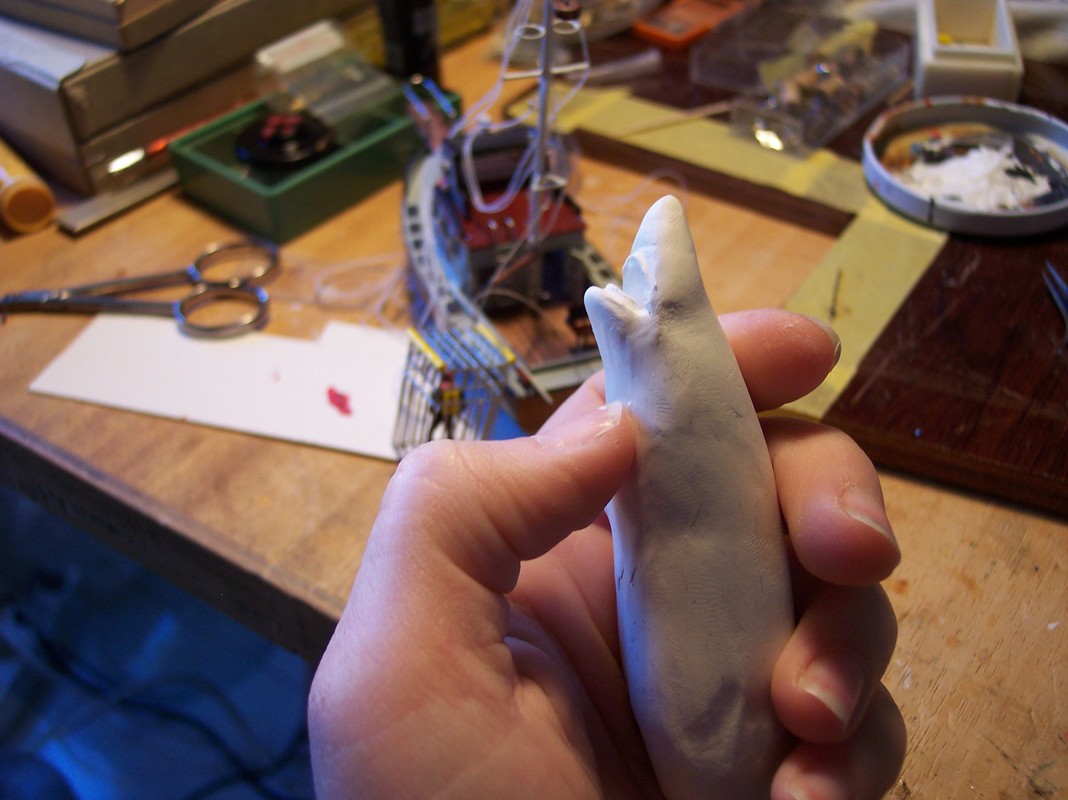
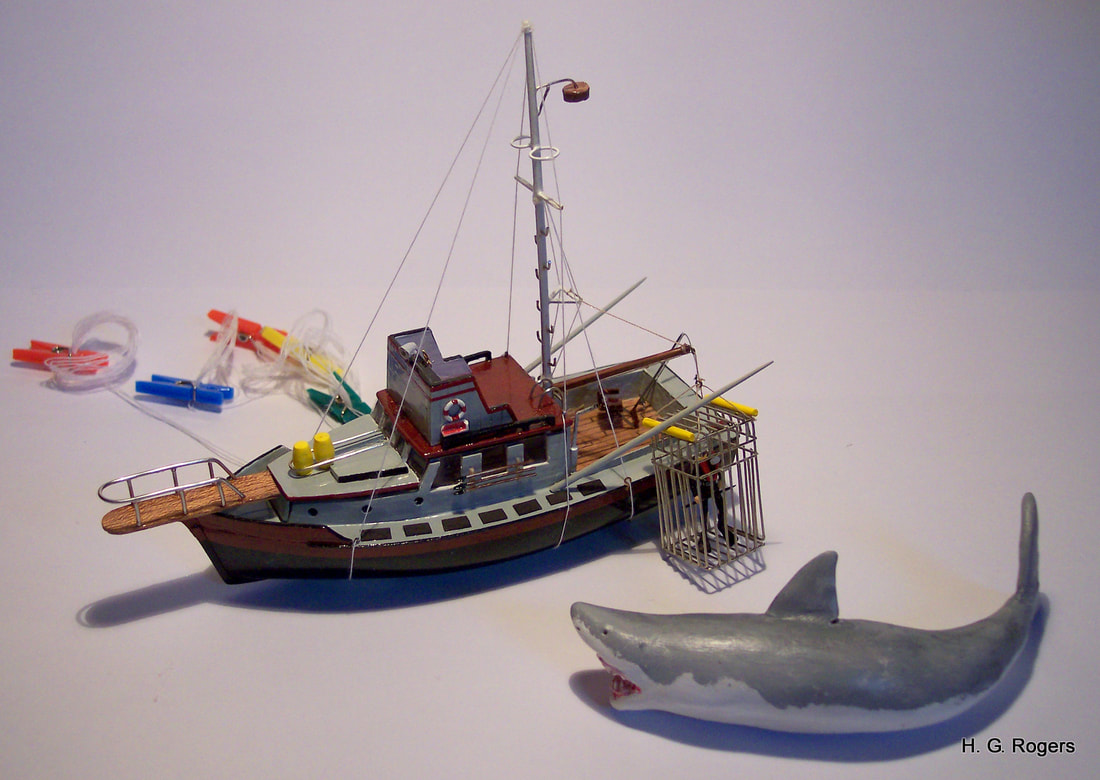
The shark is carved from sculpey clay. This is a really great medium to use because it doesn't air dry, giving you ample time to work on your project. It holds its shape well and is also easy to work with. Small pieces, like each individual tooth can be added, knowing that they won't break off later, after it's cooked. Once the sculpture was complete, I cooked it in my kitchen oven. Of course, I took liberties on the actual size of the shark, making him even larger than he was in the movie. Overall, it should make the whole scene just a bit more impressive!
|
|
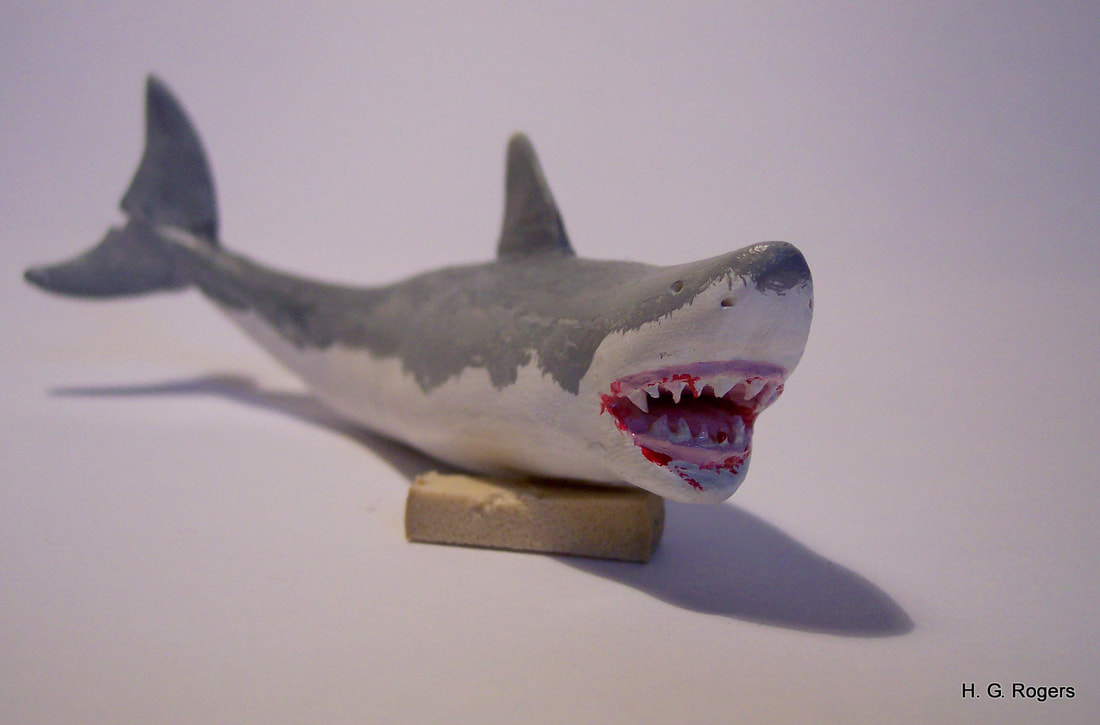
After cooking Bruce (the shark's nickname during filming), I painted him with acrylic, making sure to add the touches of blood around his teeth, so that he'd appear extra scary.
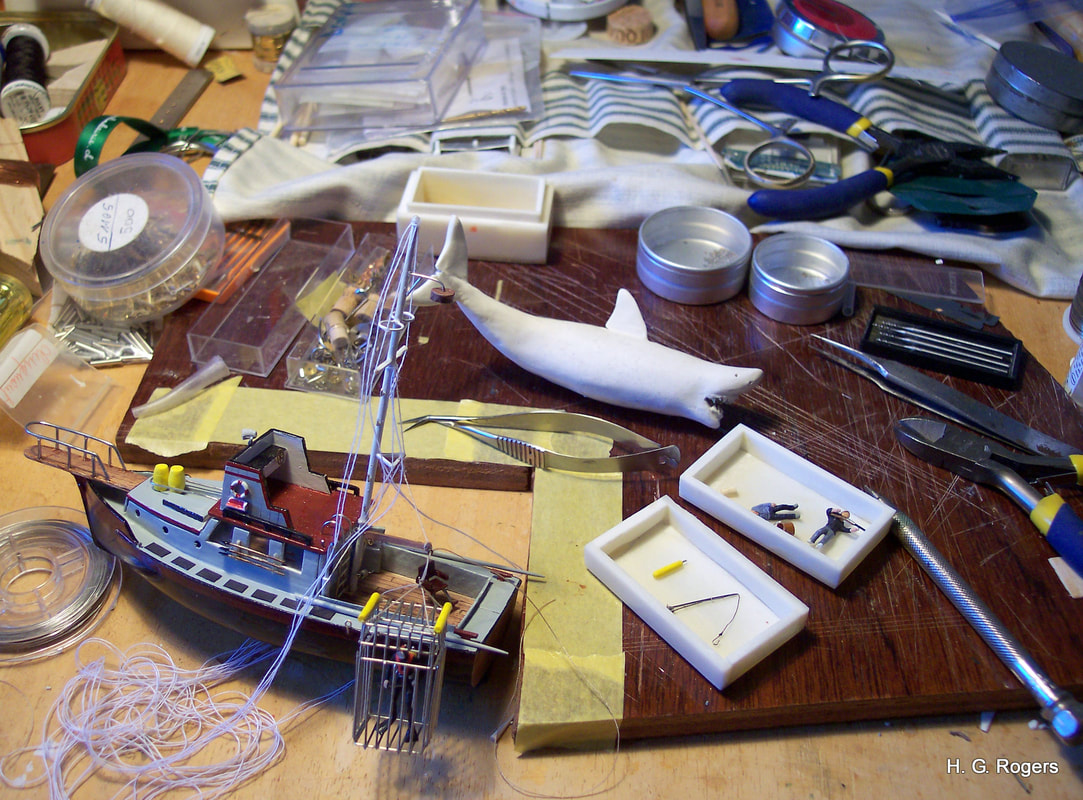
The photo left, gives you a nice idea of the size comparison between Bruce and the Orca crew. The yellow scuba tank will be in the sharks mouth once it's positioned in the bottle. |
Ready for the Bottle:
|

|
|
After the fun and creative building process, I was ready to begin the complicated procedure of inserting the Jaws scene into the bottle...piece by piece.
Inserting Scene in Bottle:
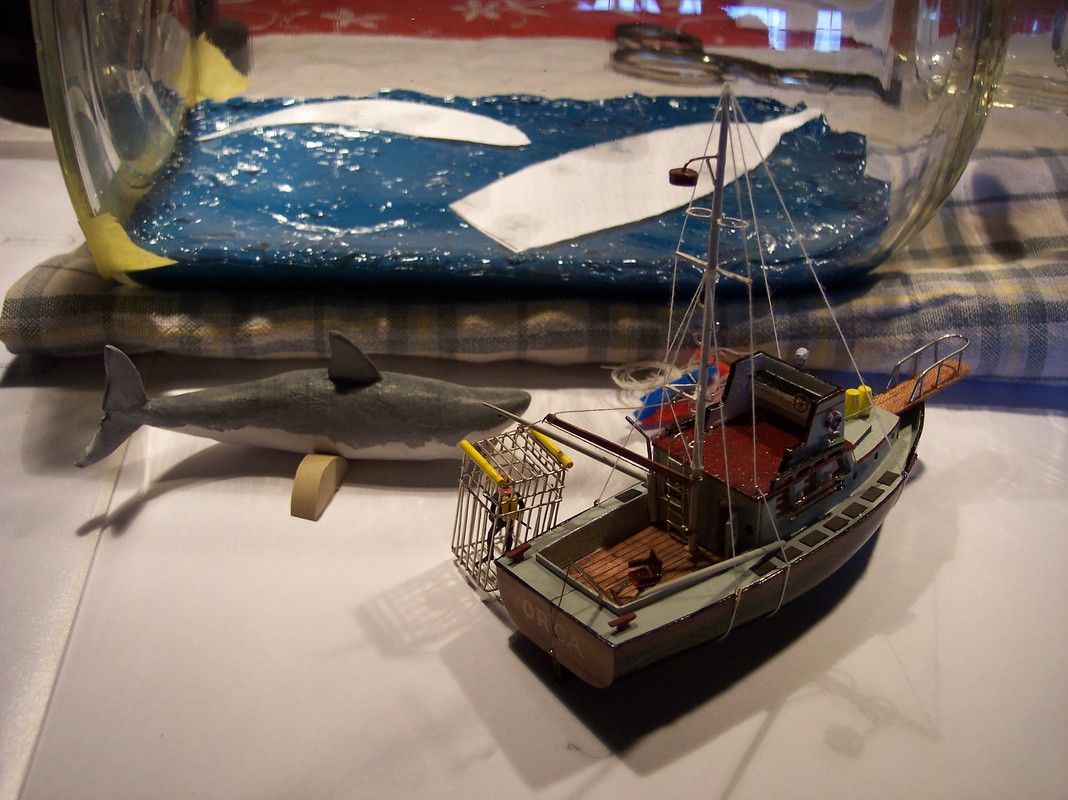
Firstly, I cut templates and measured the space to be sure that everything would fit properly. The shark went in first. I ended up having to cut the bottom of his tail fin off, so that he could be pressed into the sea. Once the shark was in position, I manipulated the putty to make wakes and painted the foamy white surface on the waves.
|
|
|
|
|
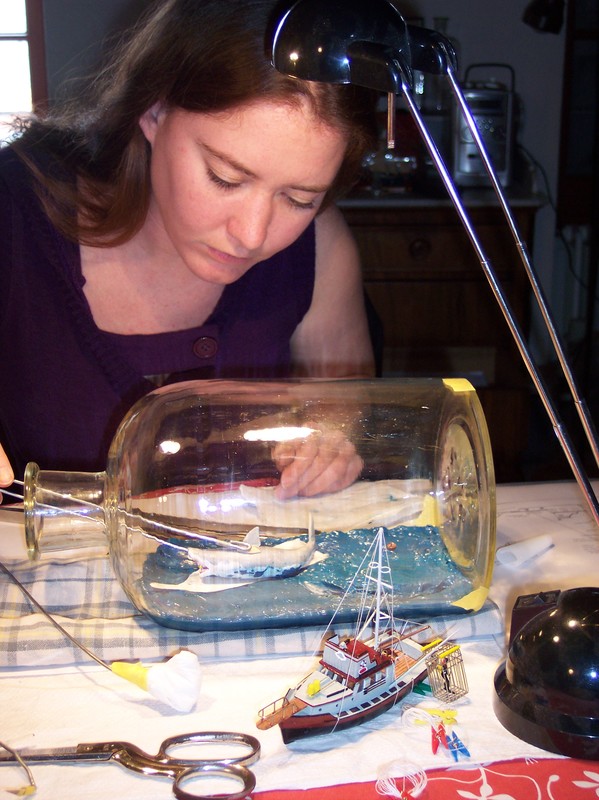
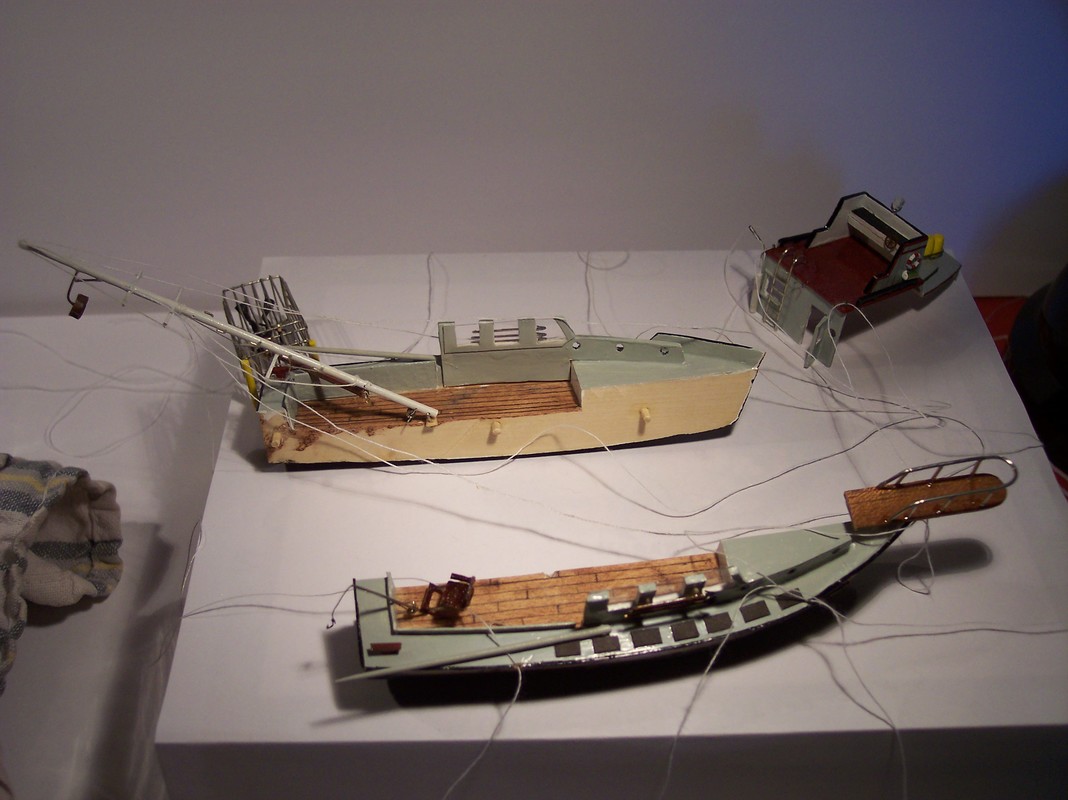
Setting up a space to work is very important when inserting a ship, with multiple parts, into a bottle. The difficult part, is that the strings (though not many) pass through multiple parts of the hull which are inserted in different phases into the bottle.
Laying out the ship on a work space with all the strings organized is incredibly important, but no matter what you do the strings will get caught and wrapped around everything. I don't know how, but a single string will manage to tie its own self into a knot!
Laying out the ship on a work space with all the strings organized is incredibly important, but no matter what you do the strings will get caught and wrapped around everything. I don't know how, but a single string will manage to tie its own self into a knot!
|

|
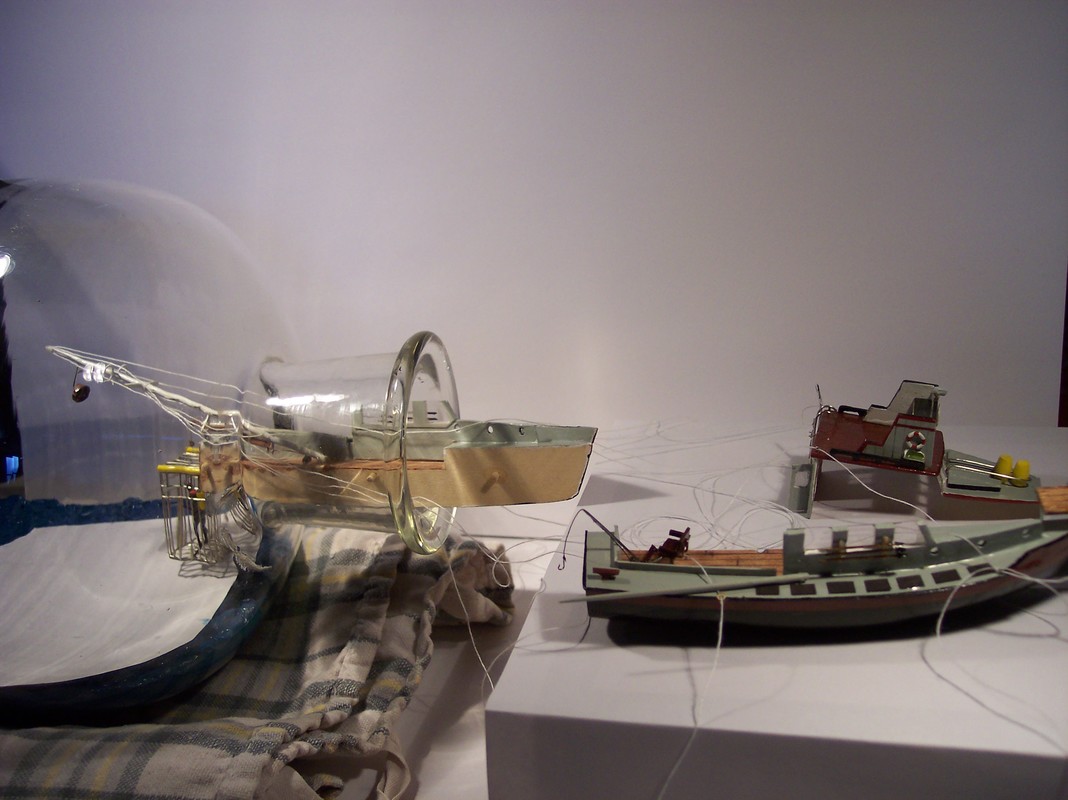
Basically, once I got all the pieces in the bottle, I had one big mess that had to be organized! The two halves of the hull were pressed together, and the cabin top positioned, pressed down, and glued in place. I slowly began pulling all the strings tight, which raised the mast into position. These strings were taped to the outside of the bottle, while each string was glued and cut off one by one after drying.
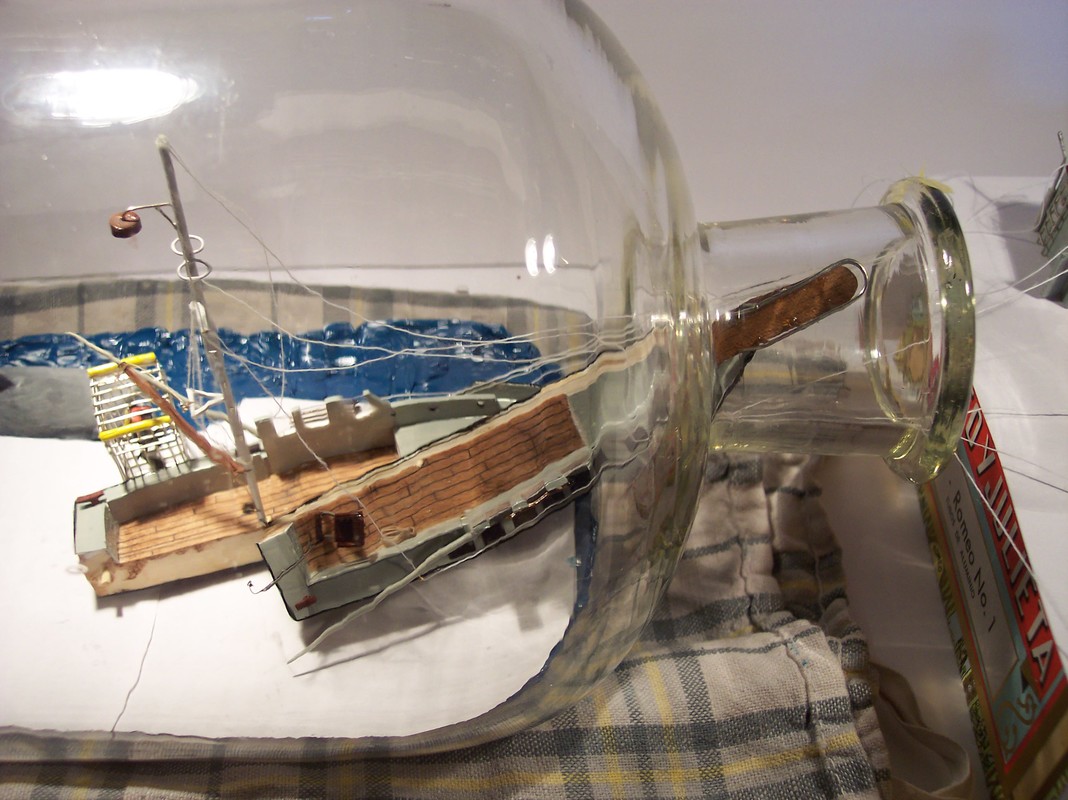
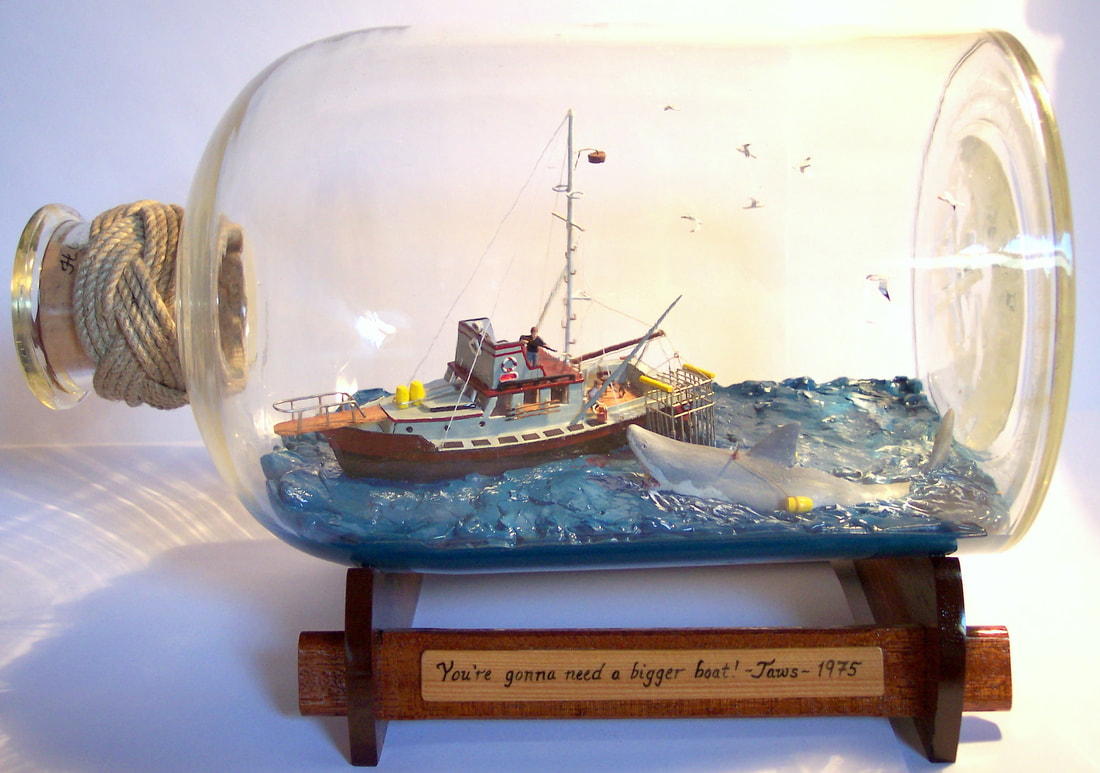
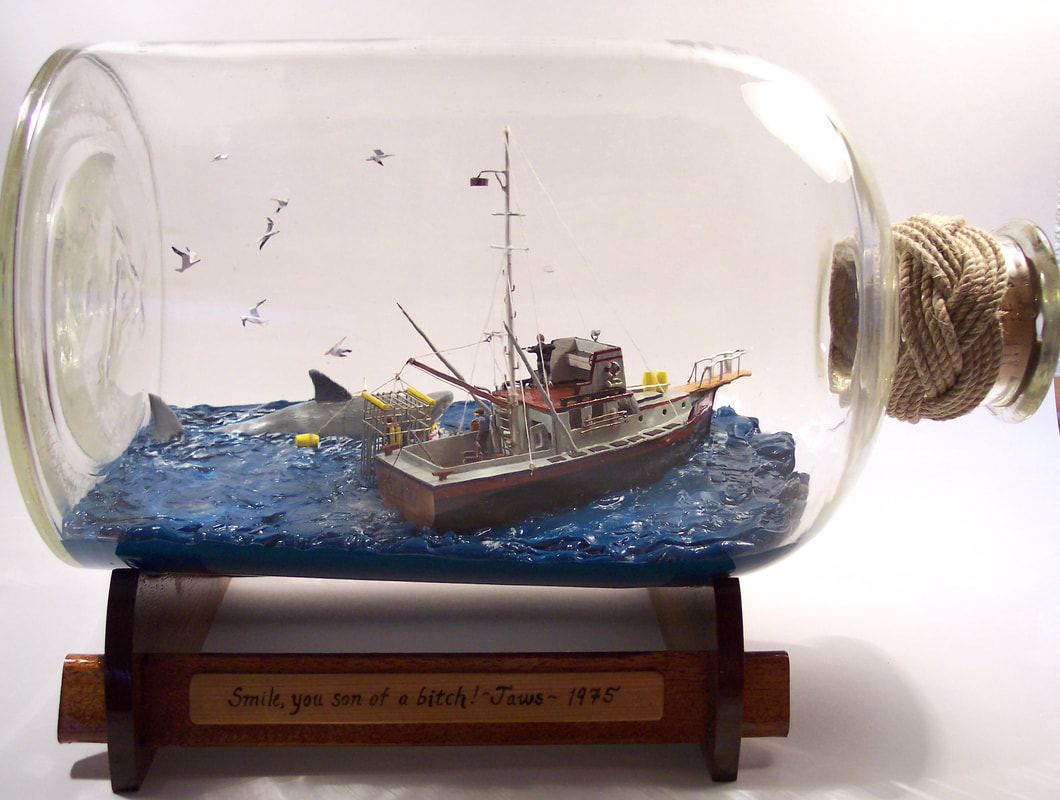
Finally, the paper was removed from underneath the model and the boat positioned and epoxied within the sea of putty. The diver and cage was also pressed into the water and white caps and foam were then added to the sea surface. Final touches on the whole project include a turks head and label on the neck as well as two famous lines from the movie, one on each side of the stand. Hope you have enjoyed reviewing this project!
Finally, the paper was removed from underneath the model and the boat positioned and epoxied within the sea of putty. The diver and cage was also pressed into the water and white caps and foam were then added to the sea surface. Final touches on the whole project include a turks head and label on the neck as well as two famous lines from the movie, one on each side of the stand. Hope you have enjoyed reviewing this project!
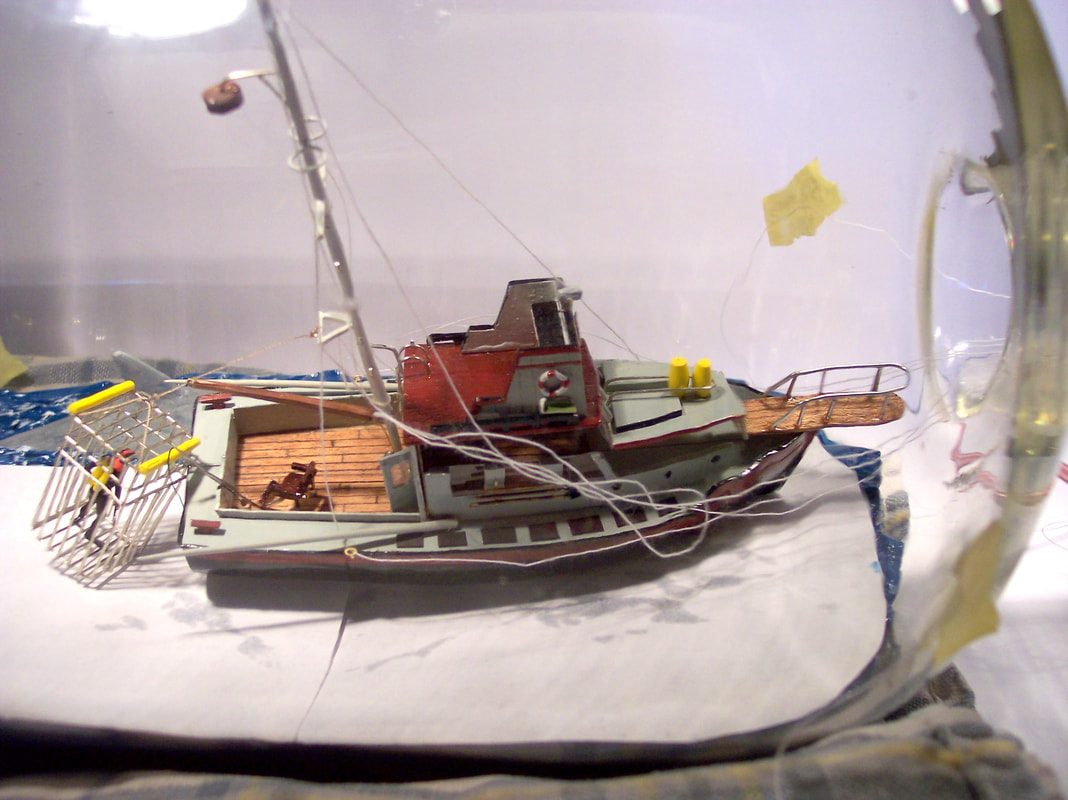
COMPLETE!
|
|